Sunday, February 9, 2014

More on the NV4500 to NP203 adapter

   The first step was to cut down the NP435 to 203 adapters with a saber saw and a hack saw. The second was to have a friend with a small Bridgeport Mill in his garage donate some Miller Time. 


Add a little CADD for fun and we find one of the holes is going to be to close to the edge of the plate.


If I had to do it again I’d grind down more material before milling.  


It took 6 hour of milling with a fly cutter.


Small BrigePort Mill with digital read outs. The casting was milled down flat then pilot holes drilled at the machine shop


The casting was milled down flat then pilot holes drilled at the machine shop.


Back at the Auto shop we drilled a taped the new holes on an old sears drill press.


The next thing is to countersink the old through holes below the surface.


The Adapter will bolt to the 203 with pan head hex bolts. The Chev 4500 adapter will be  grade 8 bolts.


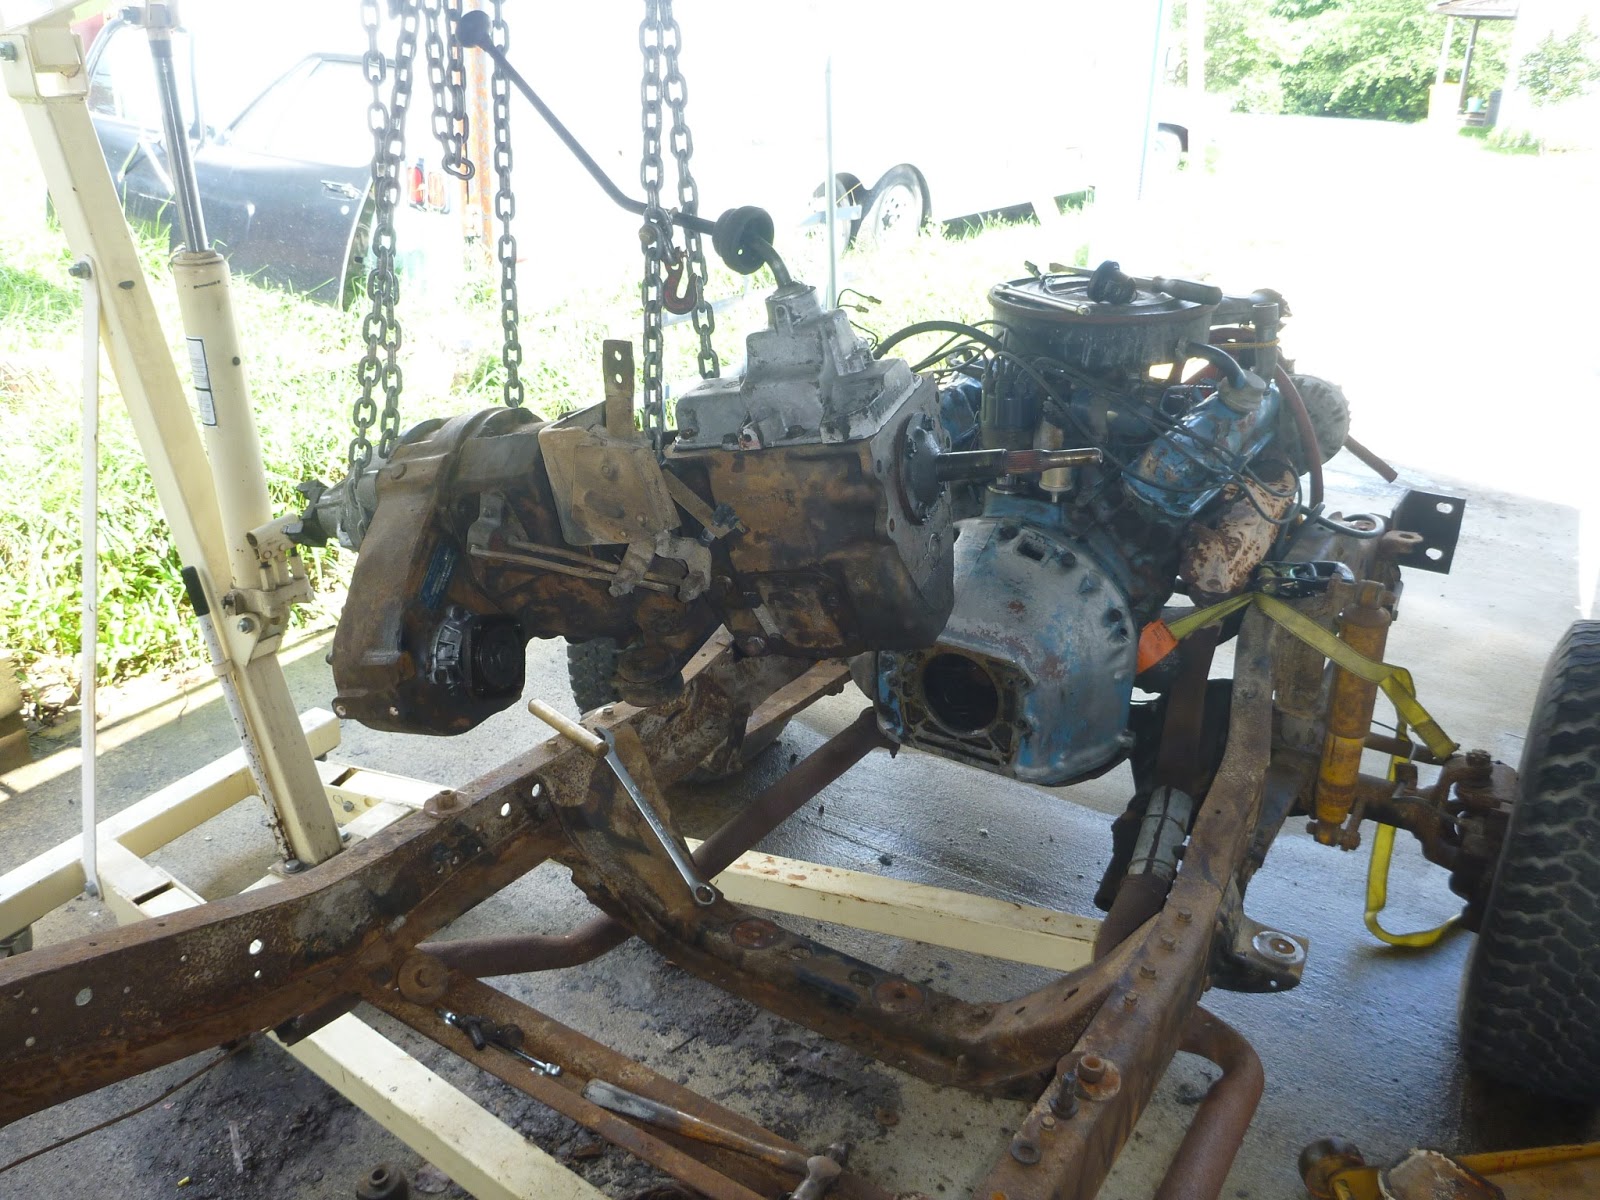
Bolting together the transfer-case and the transmission will come soon, in the interim strip the paint off of them both and paint them with POR15.

Dry fit of the Transfer –case and the Transmission with adapter plate.


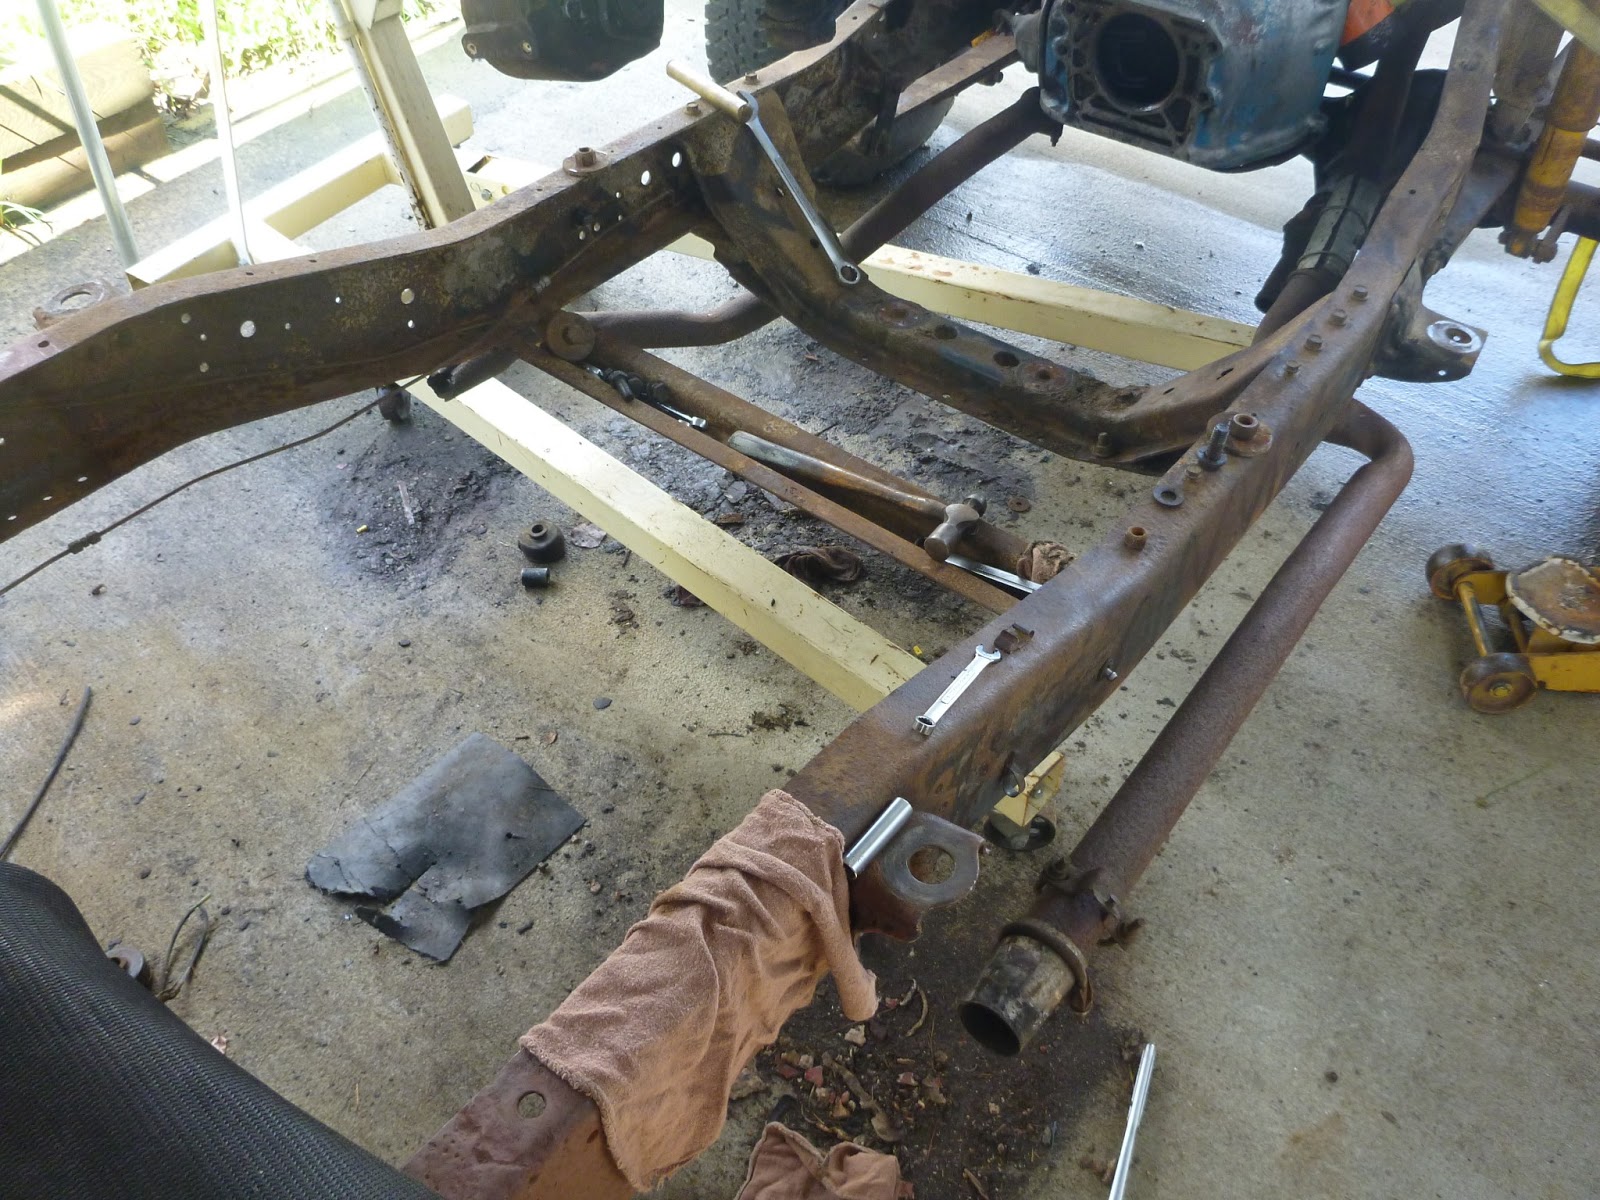
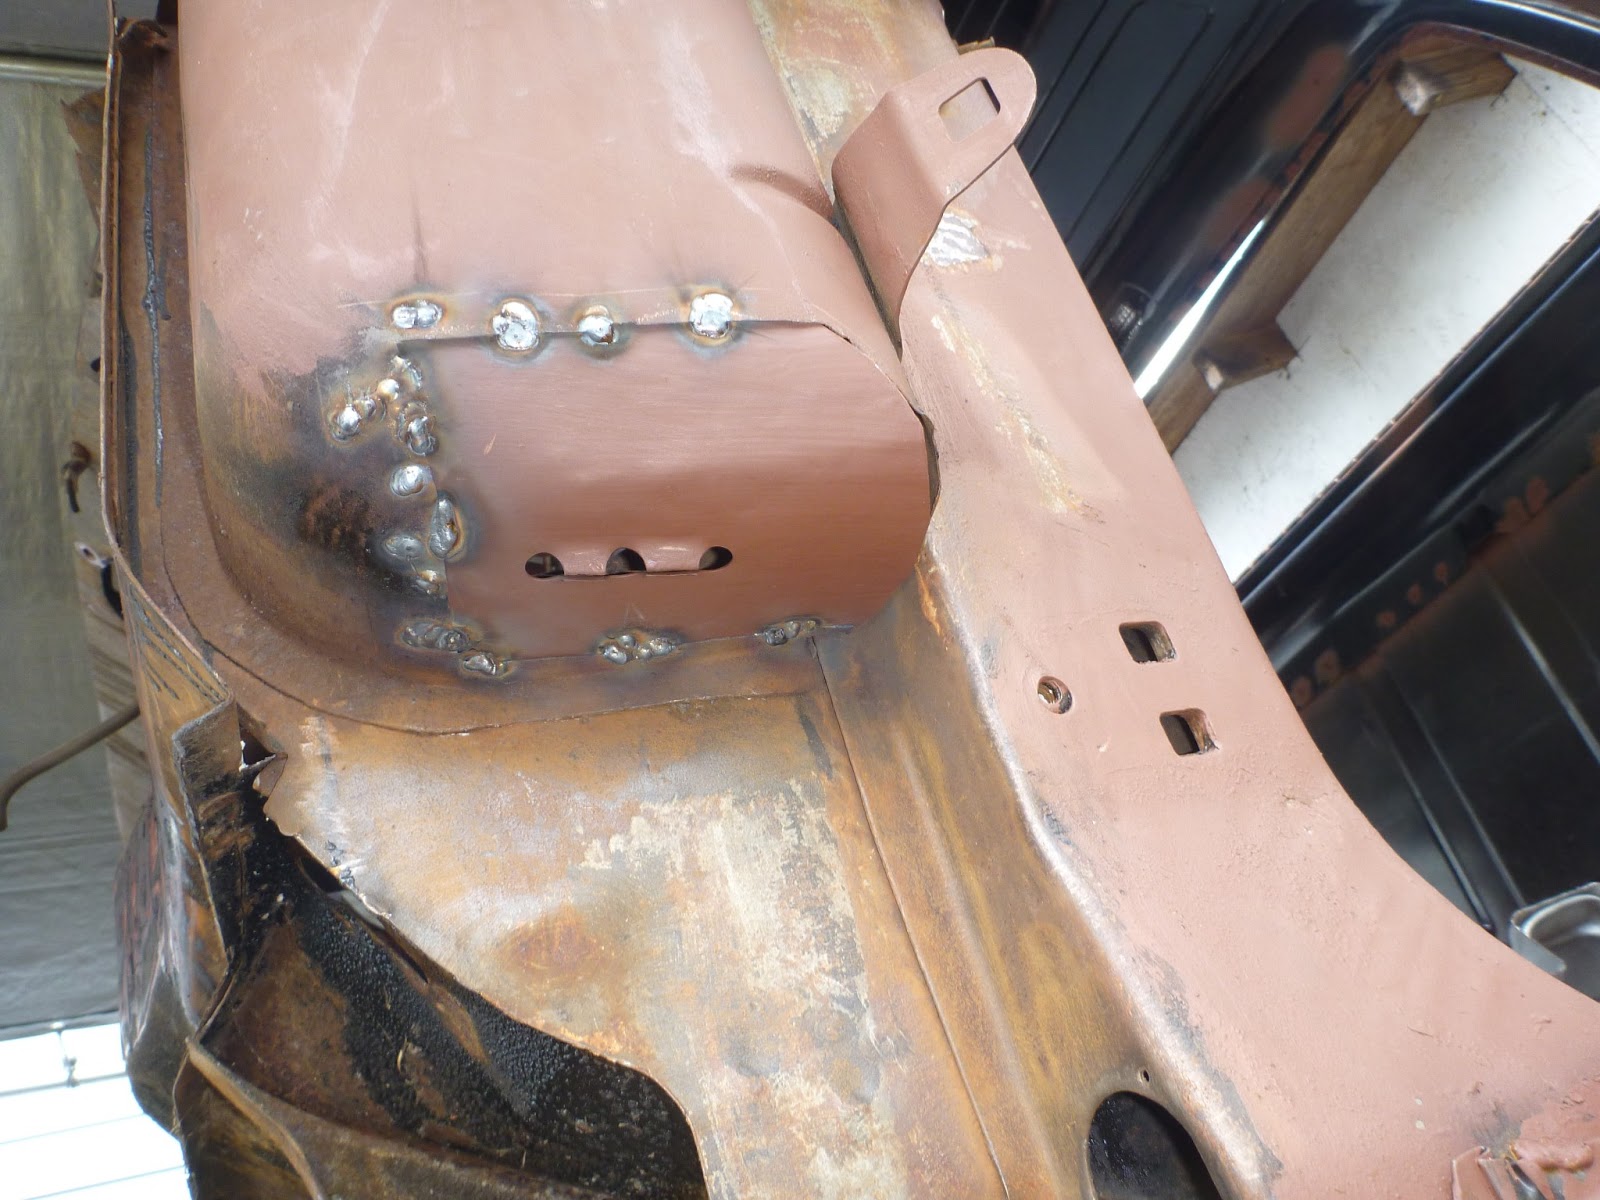
We are reusing the original transmission mounts, and crossmember. In order to strengthen the connection (as one of the bolt holes is to close the edge of the plate for a full sized bolt) we are fabricating a mount to tie the transmission to the T-Case mount.


 Here is the mark up of the mount.


Saturday, November 30, 2013

NV4500 to NP203

I will start with the drive train. We had the NP203 rebuilt using a full master rebuild kit (every seal, gasket and roller bearing). While it was apart we had them install a Mile Maker 501 part time kit and a TH400 input shaft. I was told that being a reasonably handy monkey of the grease sub sect, I could rebuild the T case myself and for the next truck I will. I have the exploded diagrams, and enough patience to get the job done. Now on to the next challenge (hooking the NV4500 to the NP203). Every one who I asked who has done this did it in a different way. 

This is the rout I have chosen. The output of the NV4500 transmission is a TH00 with the Chev 4WD tail section.


Chevy tail section


The new NV4500 with the Chevy Tail Section


The bolt pattern for tail section was going to drilled into the fount surface of the NP203 however the T Case was out for rebuild when the Transmission arrived.  So in order to follow this plan we would have to disassemble the front of the 203 and drill the outer case.This method gave us about 2.6 inches of spline engagement.


The NP203 front face


  Chevy tail section


The new plan (which dose not involve disassembly of the 203 internals) is to remove the old NP203 to NP435 adapter and machine it down to an adapter plate. The bolt pattern for tail section will be drilled into the adapter plate.we will loose about 1/2 inch of of spline engagement from the thickness of the plate. 
So this method gave us about 2.1 inches of spline engagement. 


NP203 to NP435 adapter


Every thing below the red line get cut off and what left on the casting gets milled down flush with the plate.


Monday, July 22, 2013

W150 pulled the Transmission and transfer case

 Pulled the tranny and T case as one.

 Now to find a NV4500 or a NV5600 Transmission to replace the NP435.

 I counted all the spines just to be certain, 23 on the input and outputs shafts.

 Rebuild time for the T case, the internal movements feel a bit off.


Rust repair of the air handler on the W150


This is the patch for the driver’s side. It was cut, formed and screwed into place in an effort to minimize any gaps.
 Quarter inch holes were drilled in between the screws and then plug welded to join the layers. The screws were removed and the holes welded closed.
 Passenger side patch.

Some of the duct was rusted thin and made for some burn through, the repair of witch made for a lot of ugly welds.

Sunday, July 7, 2013

Playing catch up, during the winter Breaks, Bearings and gas tank on the W200

W200 Club cab

 My truck the W200 was up on the lift from February to April.
While it was up it got all new breaks (soft and hard lines, Calibers, Pads, shoes). 
 The front passenger side wheel bearing and inner axial were trashed as the last guy who had it apart did not assemble the bearing in the right order. The front axial is a Dana 44-HD just like on the M880. I got a used font right axial off of eBay, new bearings from the local parts store and was a victim of highway robbery at the local dodge dealer ship for an Axial Nut..
The new soft lines did not bolt up correctly, I fabricated an adapter. These lines are far easier to find and less expensive than NOS.
 Replaced the upper and lower ball joints.
 The W200 has an after market trailer break controller. I might keep if it cleans up nice. I don’t  like the idea of putting a T on the break line(as see in the photo) and running that line trough the fire wall and into the controller on the dash.
 I went through the differentials changed the gear oil and and by April thought I could at least drive it around the yard, my mistake.
   1. The power steering rubber line was leaking like a sieve.
   2. The break booster diaphragm had a large vacuum leak. So I thought way not make a clean sweep and replace both the Master cylinder and the Break Booster. The way all new breaks.   
The Gas tank fuel level sending unit for these tanks are crazy expensive. Since I am doing two of these 78s I bought one sending unit and I am using it as a guild to remake a generic unit to the same spec. 


Thursday, July 4, 2013

Leafs + water = this all ways rusts out

Continuing cab rust repair and clean up.

 The bottom of the air handler rust out predicable as derby and water collects in the air duct. Seen here is the cut away passenger side view.  The thinned rusty metal is removed.
 A patched fabricated out of new sheet steel with a hammer and sandbag. The patch is ¾ of an inch bigger than the hole on the two overlapping sides. I cut a drain into the bottom of the patch to help remove any future derby. I will let you know is it works in another 35 years.
 
 To hold the patches in place I predrilled some 1/8 inch holes trough the over lapping parts and screwed them tight together.
 
 I then drilled some ¼ inch holes in the outer layer between the screws and plug welded in the patch.  The screws were then removed and the 1/8th inch screw holes welded shut.
The driver side. 
 This sides patch placed on the out side to show overlap and predrilled screw holes.
 Patch in place.
 Screwed.
welded.

Ugly I know but that's what the fender will hide.

Thursday, June 27, 2013

Drive train clean up

It's Time to clean up the drivetrain.

Every thing getting power washed, wire brushed, and taken apart.
 This is a 318 engine with a 4 speed manual NP435 Transmission and a NP203 full time 4 wheel drive Transfer case.
 For this truck we are thinking about adding a RV cam for the engine if it's in other wise good shape, replacing the NP435 with a NV4500 5 speed over drive Transmission and a rebuild kit for the NP203 Transfer case.